A slight diversion from my AR build to work on a small project.
After much internal debate I finally purchased the tools to thread barrels for choke tubes. I have several I want to do and the cost of tools is on par with the cost to get them all done so I opted to buy tools. :-D

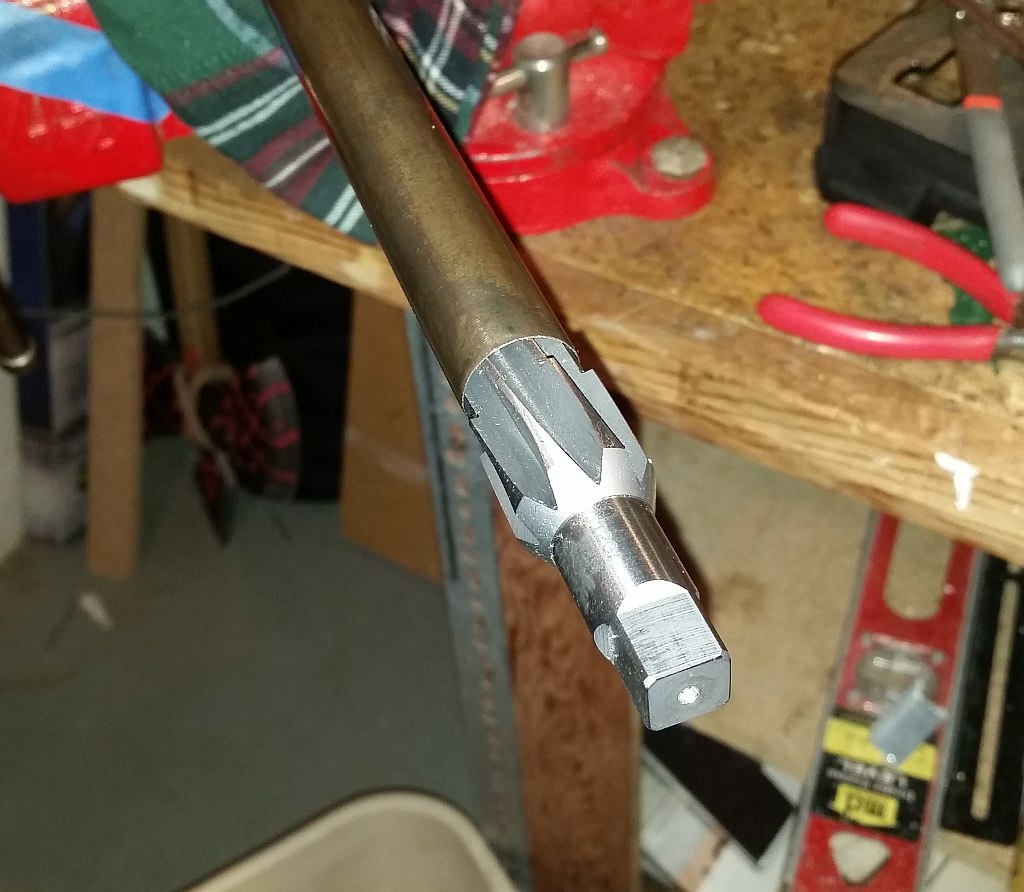
The thread tap is on top and the reamer in on the bottom. The brass parts to the right are bushings. You need to use the largest bushing you can that still fits easily into the barrel, this is what keeps the tools in a straight line.

My high tech driver for the reamer. The tools have a 1/2" square shank so I had to engineer a tool to make it fit into my drill.
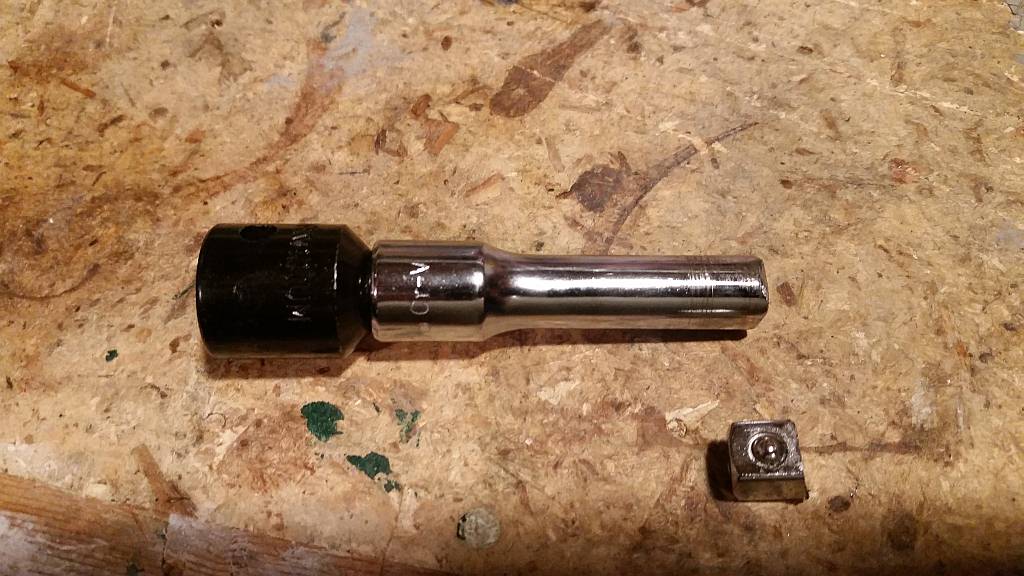
I found that a 3/8" socket extension worked really well and that a 1/2" adapter fit the reamer perfectly.
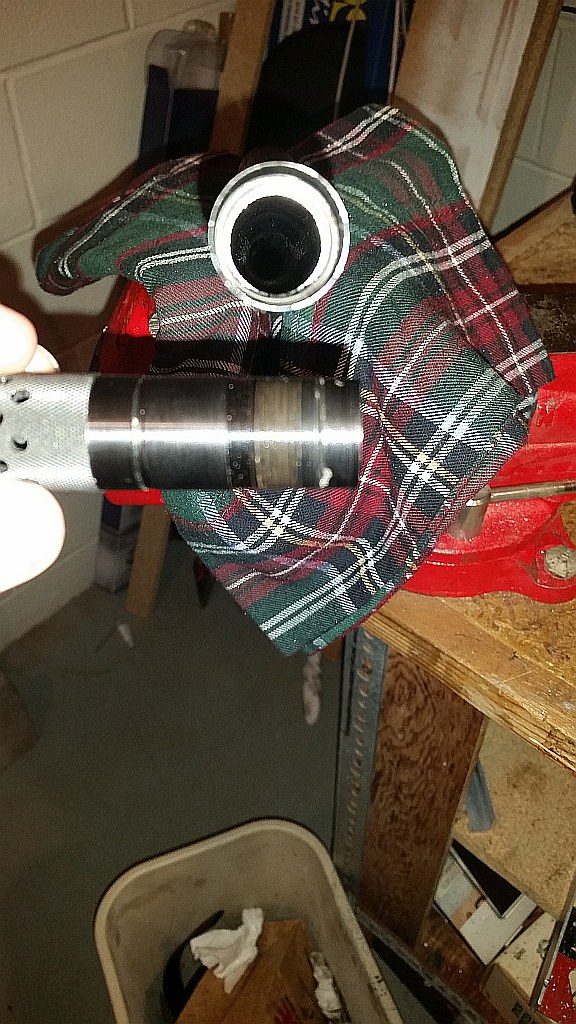
Reaming the barrel and almost done. It cuts in steps. the first step is where the threads are cut and the 2nd is the diameter of the choke tube. Cutting gets harder once you hit the second step as you are cutting two steps into the barrel.
You can see here the steps on the reamer and how the bushing attaches to the end.
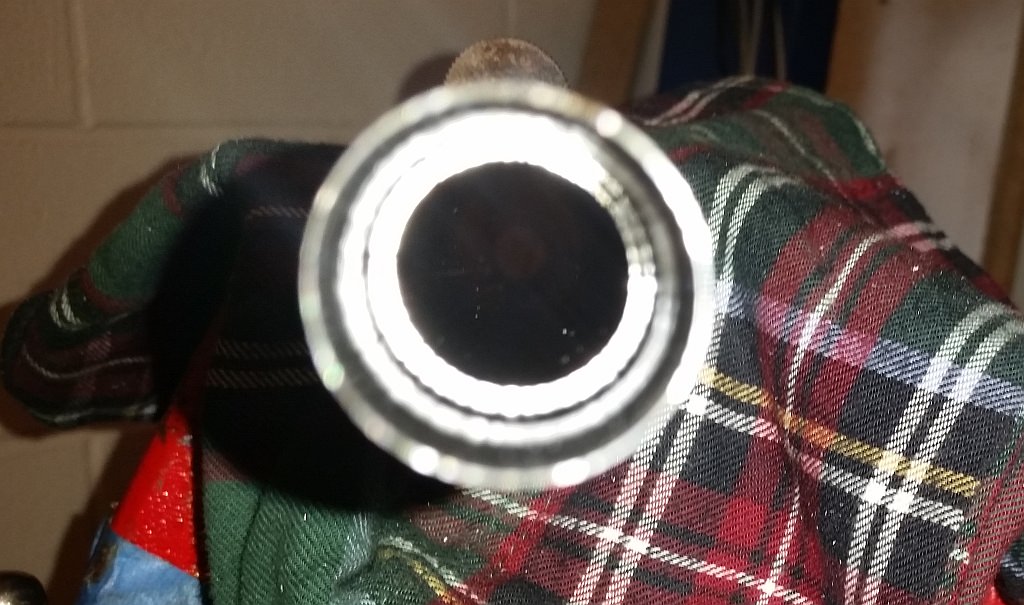
Reaming complete and the steps are cut into the barrel. This actually took a LOT longer than I thought it would. I went as slow as I could without creating too much heat in the barrel. I probably could have gone faster but then I would have had to take periodic breaks to let stuff cool down so I suppose it's probably a wash, better slow and safe IMHO.

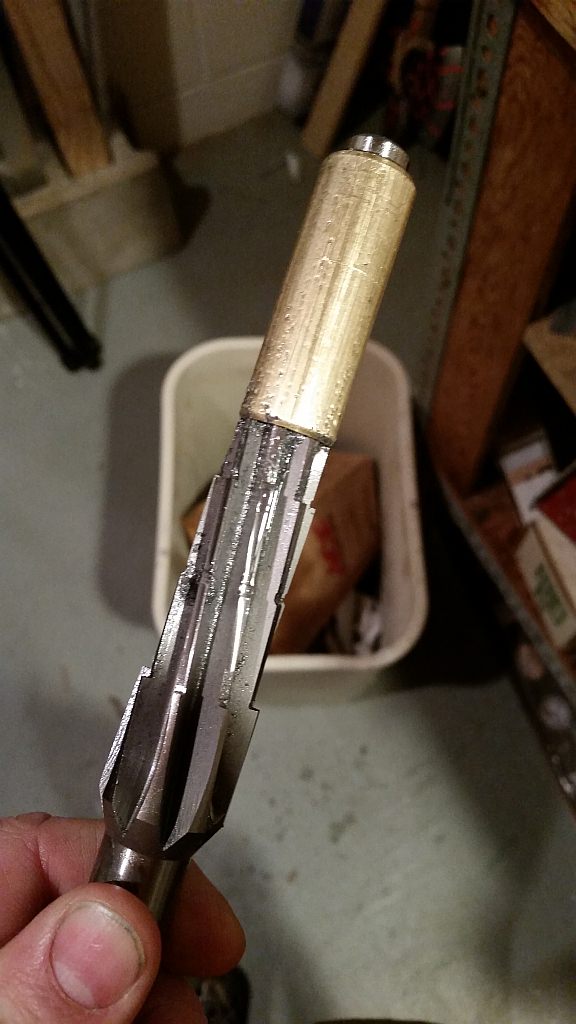
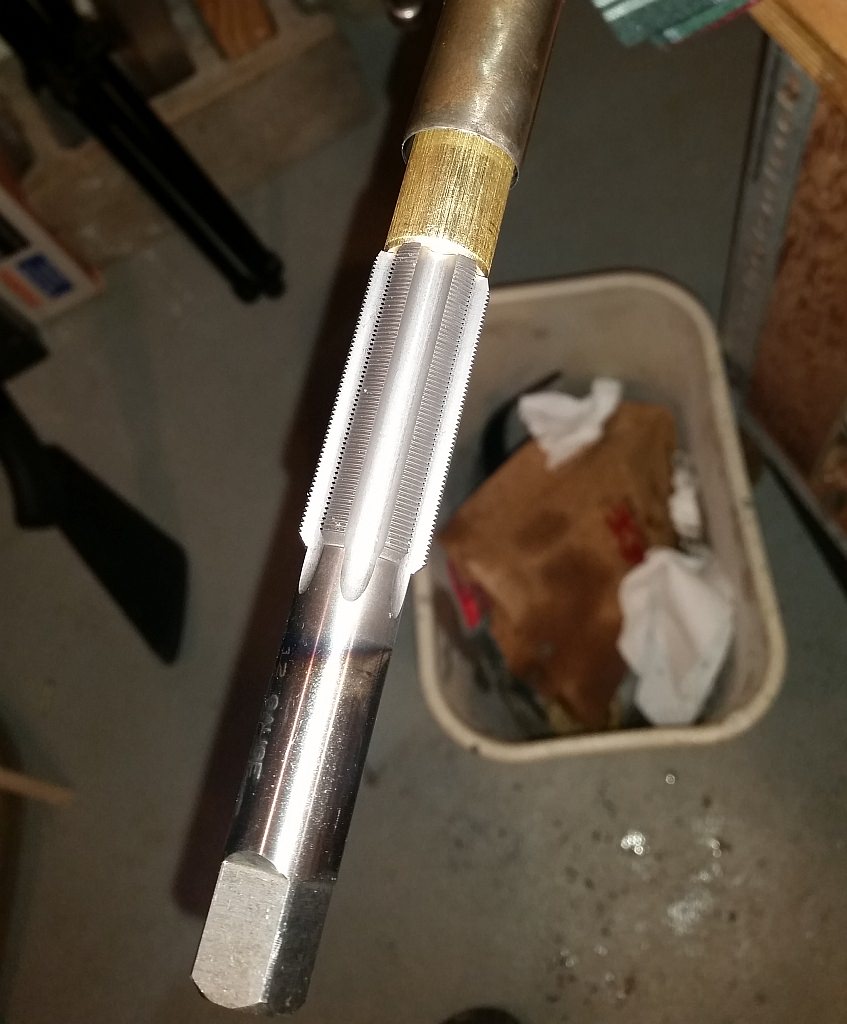
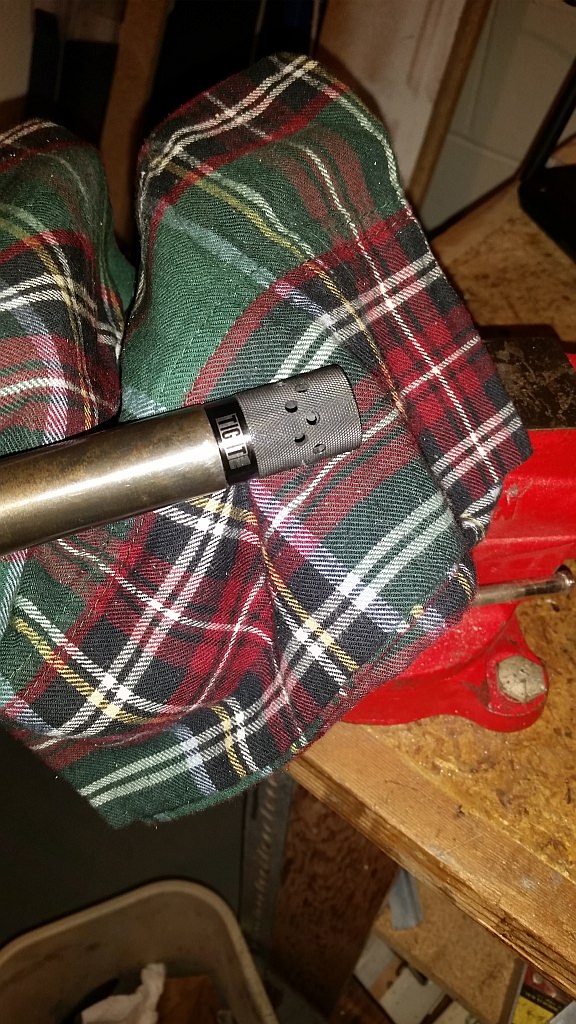
Tap for the threads ready to go. Note this is the same bushing I used on the reamer in the first stage.
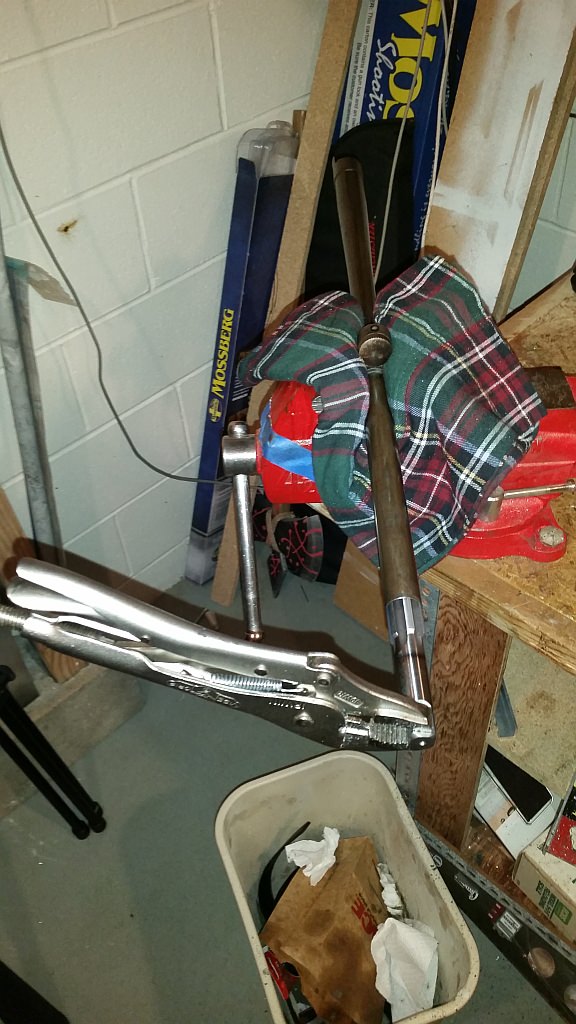
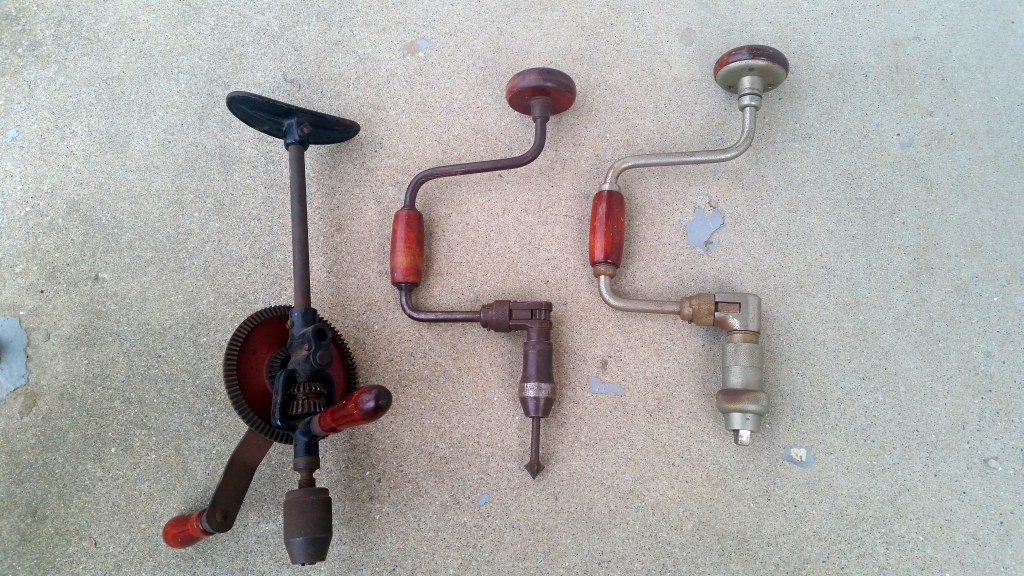
I do not have a tap handle that fits this tool so I improvised.
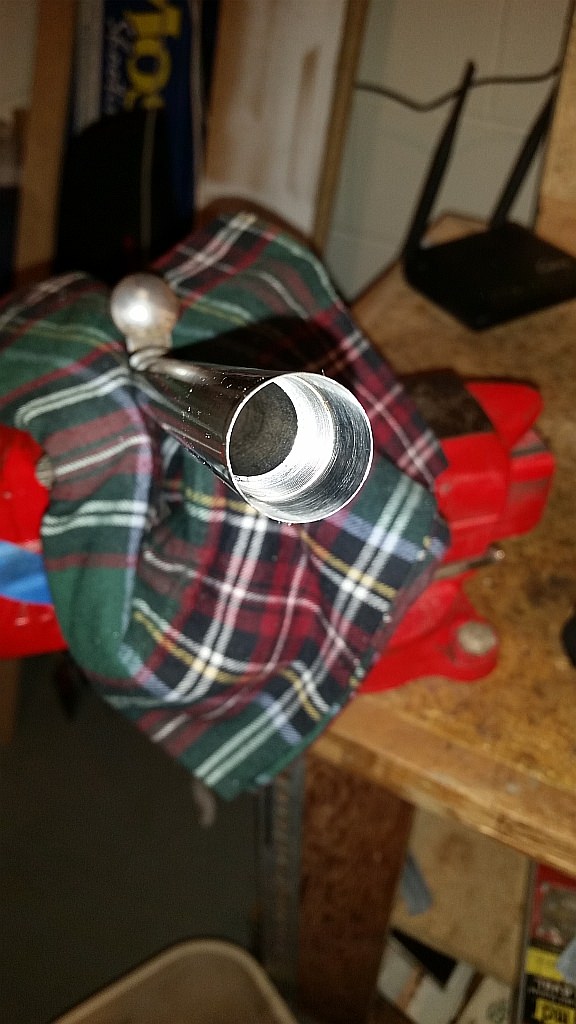
Threads cut. I ran the tap twice. Once for the initial cut, cleaned it off and ran it down again just to make sure I had clean threads.
Turkey choke tube.
Tube fits perfectly.
It's Miller Time!!!
Overall thoughts: The process takes a lot of time. I probably had 4 hours into the entire project. I also stopped and cleaned the reamer every few minutes. For some reason as I cut deeper and deeper, some small bumps developed along the cutting edge. I was probably not applying even pressure throughout the cutting process. As a final step at the end I oiled everything up good, set the drill on high and let it rip with very light pressure but increasing until the bumps were milled away. I ended up with very smooth lines on the steps.
Conclusion: I am extremely happy with the results.
After much internal debate I finally purchased the tools to thread barrels for choke tubes. I have several I want to do and the cost of tools is on par with the cost to get them all done so I opted to buy tools. :-D
The thread tap is on top and the reamer in on the bottom. The brass parts to the right are bushings. You need to use the largest bushing you can that still fits easily into the barrel, this is what keeps the tools in a straight line.
My high tech driver for the reamer. The tools have a 1/2" square shank so I had to engineer a tool to make it fit into my drill.
I found that a 3/8" socket extension worked really well and that a 1/2" adapter fit the reamer perfectly.
Reaming the barrel and almost done. It cuts in steps. the first step is where the threads are cut and the 2nd is the diameter of the choke tube. Cutting gets harder once you hit the second step as you are cutting two steps into the barrel.
You can see here the steps on the reamer and how the bushing attaches to the end.
Reaming complete and the steps are cut into the barrel. This actually took a LOT longer than I thought it would. I went as slow as I could without creating too much heat in the barrel. I probably could have gone faster but then I would have had to take periodic breaks to let stuff cool down so I suppose it's probably a wash, better slow and safe IMHO.
Tap for the threads ready to go. Note this is the same bushing I used on the reamer in the first stage.
I do not have a tap handle that fits this tool so I improvised.
Threads cut. I ran the tap twice. Once for the initial cut, cleaned it off and ran it down again just to make sure I had clean threads.
Turkey choke tube.
Tube fits perfectly.
It's Miller Time!!!
Overall thoughts: The process takes a lot of time. I probably had 4 hours into the entire project. I also stopped and cleaned the reamer every few minutes. For some reason as I cut deeper and deeper, some small bumps developed along the cutting edge. I was probably not applying even pressure throughout the cutting process. As a final step at the end I oiled everything up good, set the drill on high and let it rip with very light pressure but increasing until the bumps were milled away. I ended up with very smooth lines on the steps.
Conclusion: I am extremely happy with the results.
Last edited:
") Could you have hand-reamed it? I'd hate to dull a reamer by overheating it...
Could you have hand-reamed it? I'd hate to dull a reamer by overheating it...