You are using an out of date browser. It may not display this or other websites correctly.
You should upgrade or use an alternative browser.
You should upgrade or use an alternative browser.
My Mossberg 590 budget build..Philippine Version...:)
- Thread starter havoc21
- Start date
Very nice and thorough update Havoc. Thanks for including all the pictures too. Are you done now outfitting it?
John, I have debated doing that with my bandolier but didn't pull the trigger yet. I think I'll do it. At worse case I can still use it as a bandolier.
John, I have debated doing that with my bandolier but didn't pull the trigger yet. I think I'll do it. At worse case I can still use it as a bandolier.
havoc21
.410
John A. said:It is definitely noticeable and is the only negative tradeoff that I can think of. But as I mentioned, is always there right when/where you need it, so it doesn't take any extra time to put on or find.
good point there John...
")
havoc21
.410
carbinemike said:Very nice and thorough update Havoc. Thanks for including all the pictures too. Are you done now outfitting it?
John, I have debated doing that with my bandolier but didn't pull the trigger yet. I think I'll do it. At worse case I can still use it as a bandolier.
Thank you Carbinemike...just sharing what i learn in this build...get reactions if ever im doing something wrong, or maybe finding a better way or alternative solution in reference to this build...like just what John pointed out, of having a bandolier or sling carry more loads, since its always with the firearm, as opposed to this rig which i have to get and outfit for more ammo capacity...my concern with this approach is the swinging weight which makes teh shotgun lose its balance, as well as ackwardness in reloading perhaps..just the same a very good point that i have to consider also...
if you mean sir if im done outfitting the rig, right now its with the fabricator, he has taken all my suggestions and retrofitting the rig to my suggested specs, for free...
a lot of shotgunners here also expressed positive reviews on the rig... they like it very much..
if you mean by my shotgun build, im still waiting for a few more items/accessories to come....just a few more, and my build is done...
havoc21
.410
Build Update:
Laserlyte tri-rail install...
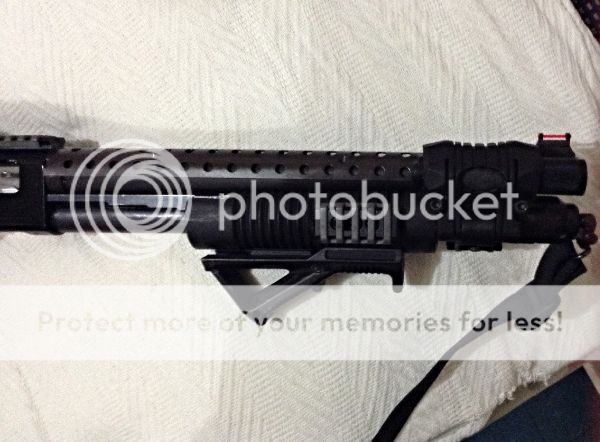
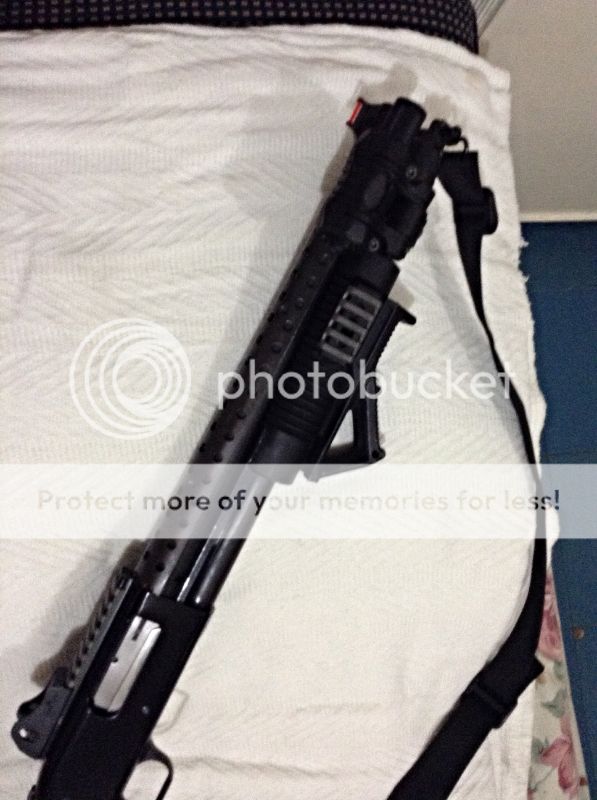
a magazine tube tri-rail installed on a shotgun is perhaps one of the easiest ways to have readily available attachments points for our firearms...extensively used in AR platforms, we have recently seen a surge of marketed 'tactical shotguns' with a host of rail features, which allows customizing the shotgun to a users' preference- be it via mounting and attachment of flashlights, forearm enhancers, sling attachment points and various sights and scopes.
i have opted to attach the magazine tri-rail on my shotgun to allow me to customize my firearm according to my preference, especially to my orientation as a left-handed individual...for shotguns with 18 inches barrel length, location of the tri-rail along the magtube was a matter of personal preference. but since i had a combination of having a shorter barrel and magazine length (14 inches) as well as a shorter forearm length (i had the 6 1/2 mossberg shorter forearm), my real estate was somewhat limited to the 1 1/2 inches free space along my magazine tube between my forearm and my magazine attachment lug-just where my heatshield flange attachment is also located...Hence my initial preference for the said tri-rail was the original Laserlyte tri-rail from USA, since it was a perfect choice for it offered versatility in mounting various devices, it takes up very little space and it is a drop-in part and no gunsmithing is needed, as it was compatible also with heatshields
i have initially bought an NC Star Tri-Rail- (thank you for this sir Optics of PPF Forums) a China made copy of magazine installed tri-rails for shotguns in the market...all in all a still very good product...if not for an additional requirement i needed in purchasing and installing the said accessory-It has to be installed together with my heatshield..under no circumstance will i remove my heatshield just to have the tri-rail fit. Thru no fault of the seller for he has forwarned me of its incompatibility with the heatshield flange, i still went ahead with the purchase only to find out first hand that I cannot fit it without extensive modifications- something i am not equipped nor skilled to undertake...i was resigned to have it done by a gunsmith in the unforeseeable future, when i also had my other accessories that i was still waiting for delivery..
But lady fortune was maybe a little kind for just last weekend i saw a laserlyte tri-rail offered by sir spartan300 ..I debated to wether i should purchase it or not, for if it didnt fit again and proved to be incompatible, ill be having two tri-rails in my inventory and none still on my shotgun! But i gambled and researched...and took the plunge of purchasing it today... (thank you sir spartan300 of PPF forums! thank you for the discount!)
Further research on the laserlyte tri rail proved that it was compatible to fit with mossberg heatshields, and that it involved a technique in securing the heatshield flanges (since its under tension) beforehand on the flanges of the tri-rail itself...or you will end up hours upon hours trying to resecure the heatshield flanges on the trirail...most of my research involved just describing it by other forumers from various shotgun forums, i want to help others also in this predicament, im taking this a step further and provide pictures for better understanding...
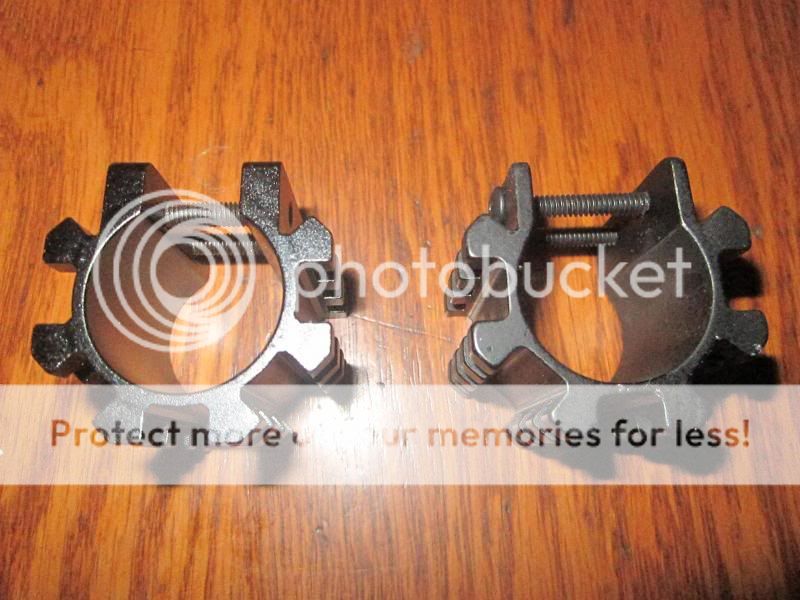
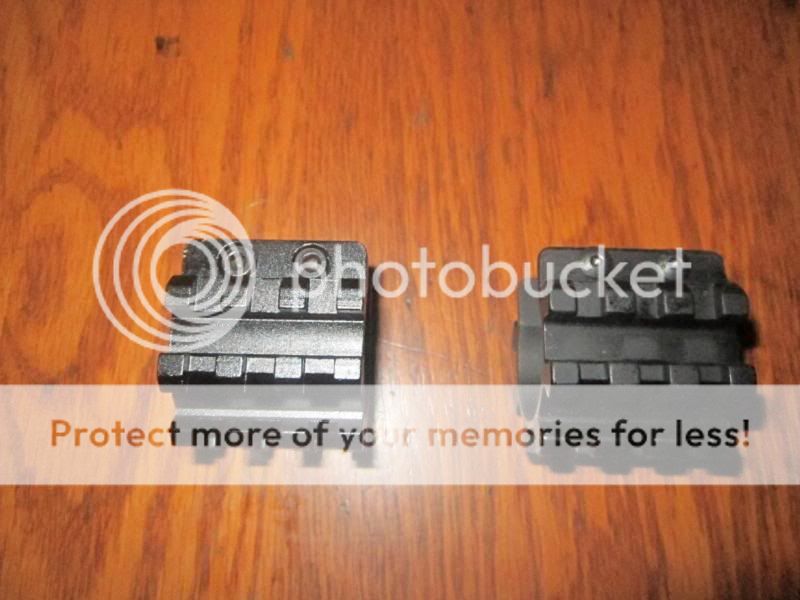
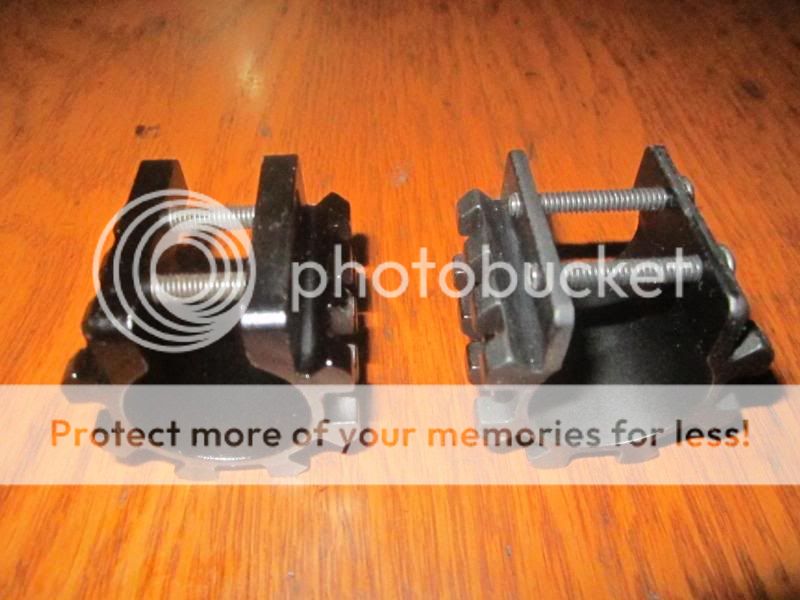
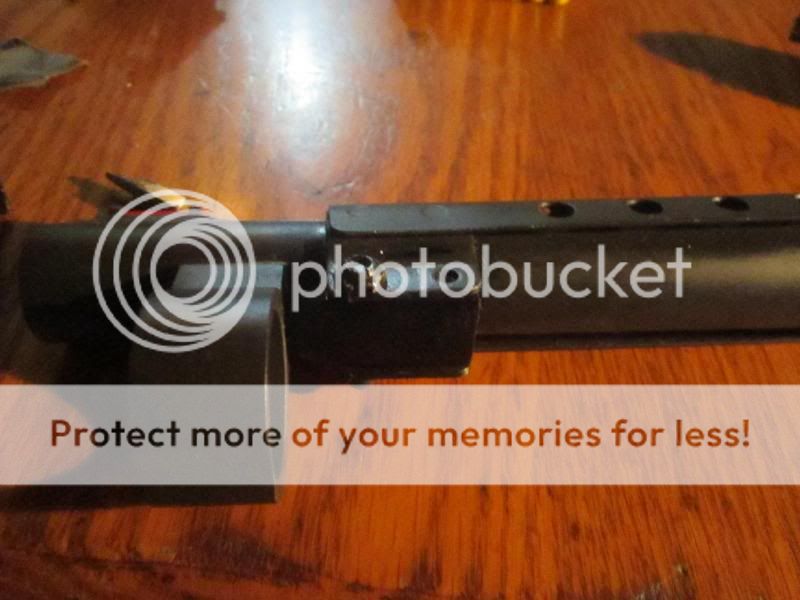
NC Star Tri-rail and Laserlyte Tri-rail: note finish, Laserlyte is much smoother and has tougher anodizing, also note the large area to clamp on the Laserlyte
first step-remove outer nut of heatshield flange
do not remove second nut- note that flange tension is still being held by the other nut
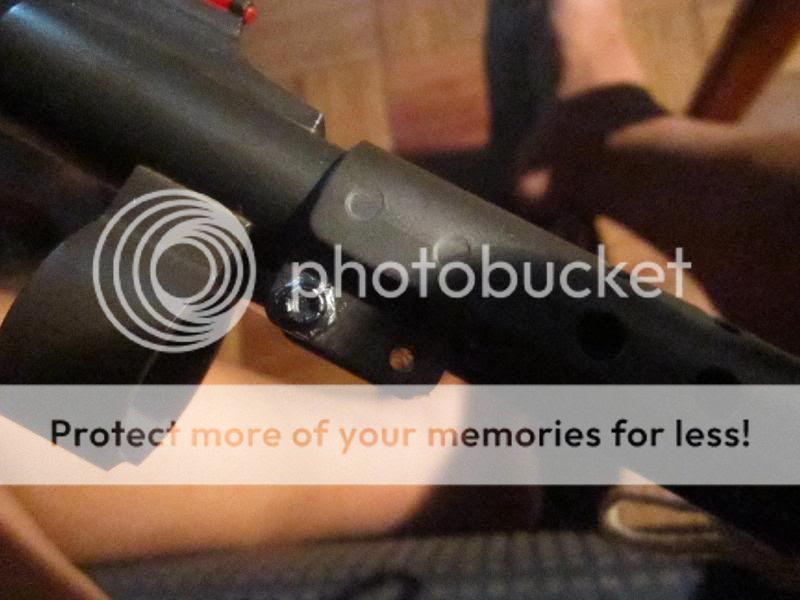
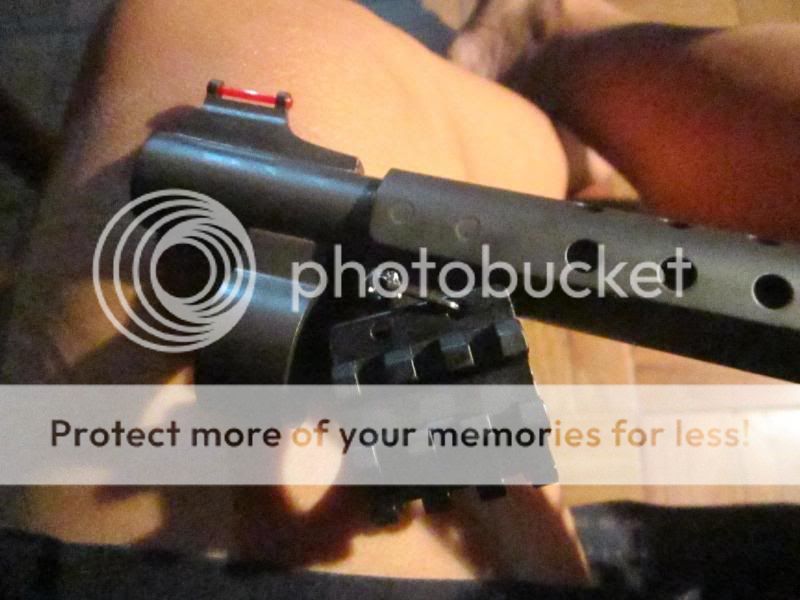
2nd step-secure Laserlyte tri-rail flange over the heatshield flange where there is no more nut- this is easy since the tension is still held by the other nut..note that i placed a small hex key to aid me further in securing the location
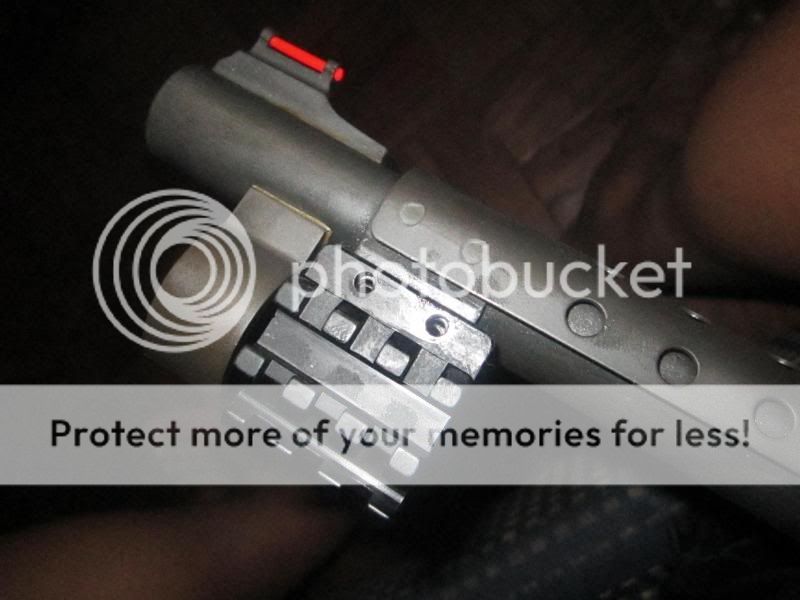
3rd step-while securing the other location hole, carefully remove the other nut until it is fully disengaged and the tension of the flange is now transferred to the tri-rail flange carefully remove the other nut and carefully align the holes in the nut as shown here
4th step-thread all holes with provided hardware nuts from the tri-rail, makes sure that it is securely threaded on the back, without threading too tightly and clamping too much laso on th magazine tube, since this would prevent easy disassembly
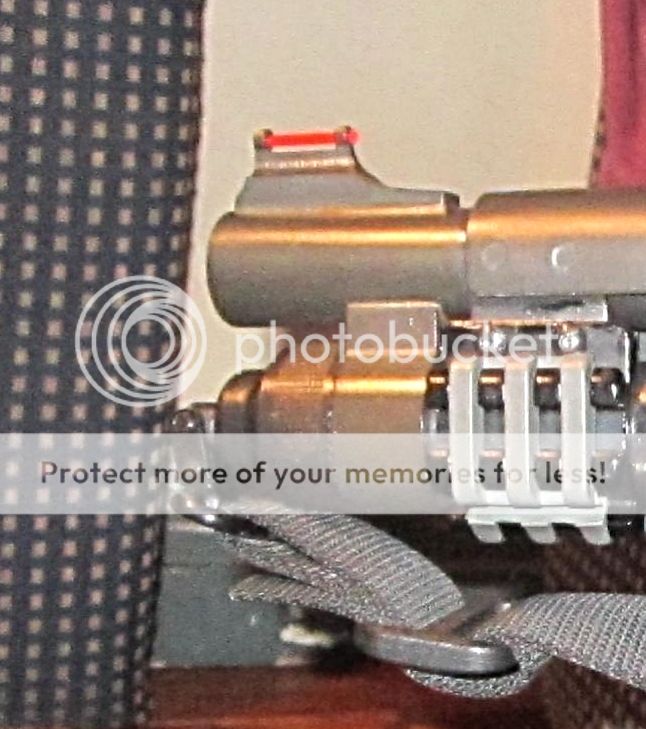
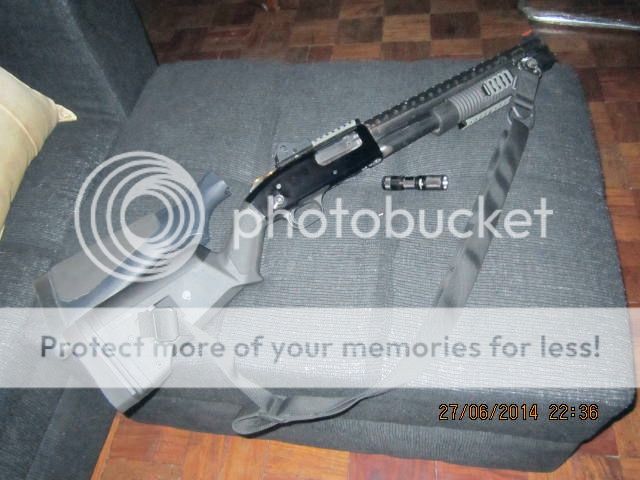
finished, with flashlight installed on the rail
Build Update:
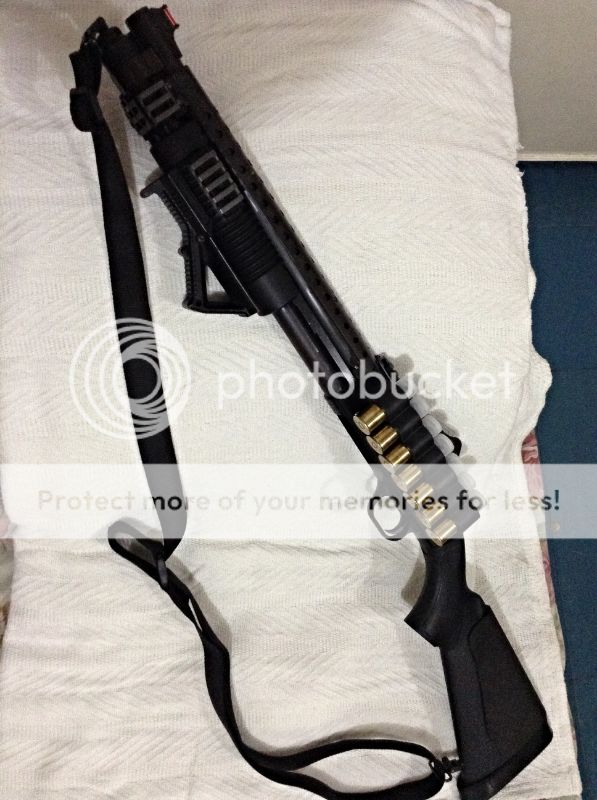
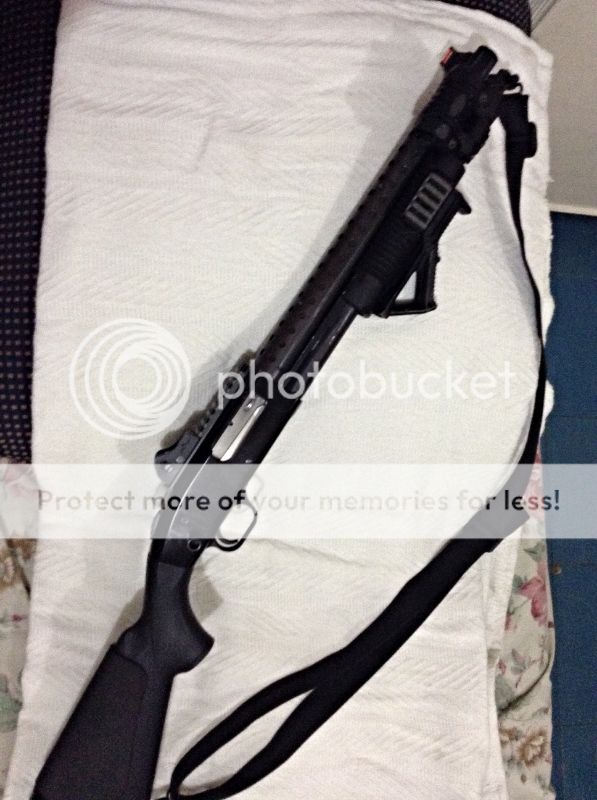
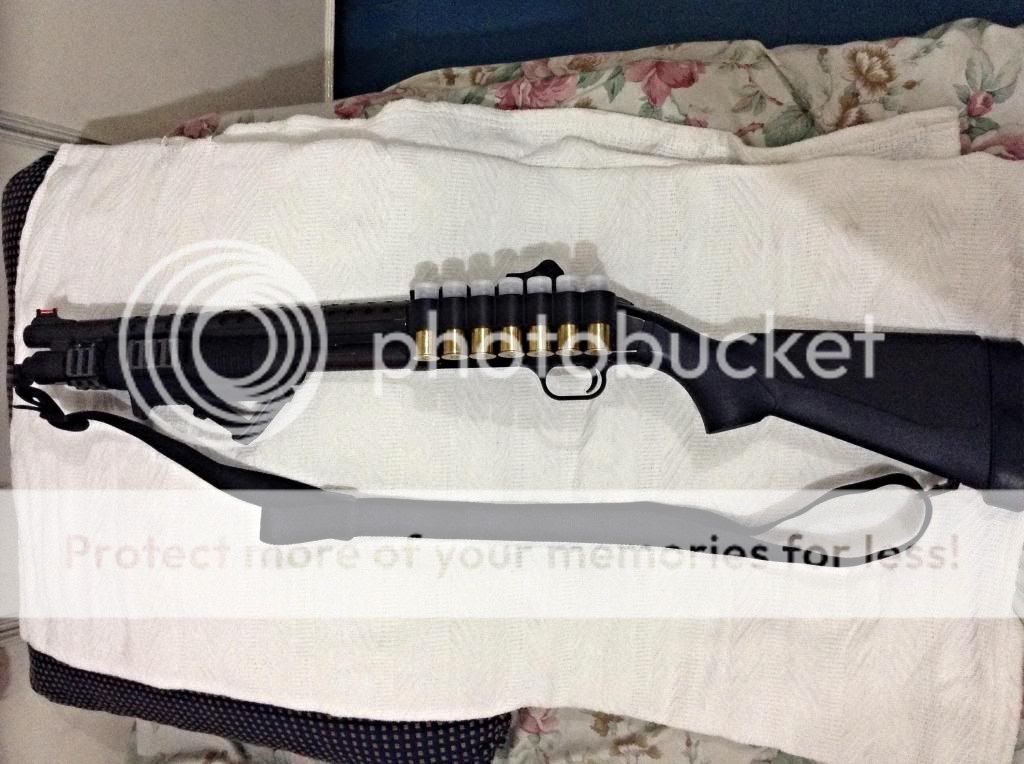
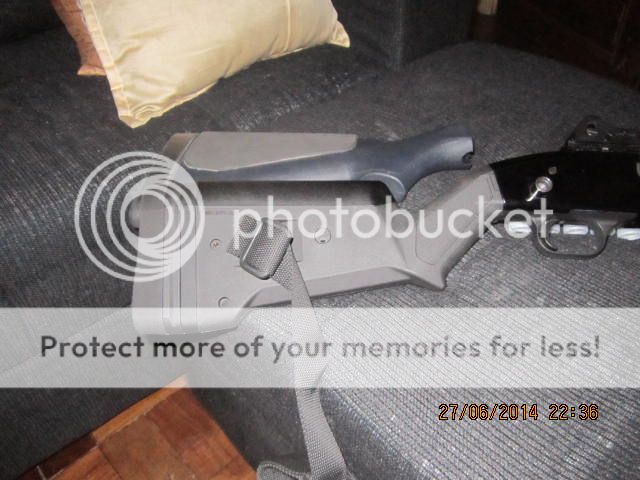
You may have noticed that i have reinstalled my regular stock: after much consideration, i have come to the conclusion that the a pistol grip set-up is just not for me...i am more fluid in movement, more in control using a regular stock as opposed to the pistol gripped one, largely due to my left hand orientation...i am not saying it is the correct one and should only be the preferred or 'right' set up-though regular stocks and its variants are correct and perfect for me..after all, one of the objectives i had for this build is to make an economical and adequate self-defense tool that fits me adequately...
plus another big reason...one word...Magpul...
ps i missed this site! barely recognized it becoz of the 'new look' and may take for awhile for me before i get used to it..
Laserlyte tri-rail install...
a magazine tube tri-rail installed on a shotgun is perhaps one of the easiest ways to have readily available attachments points for our firearms...extensively used in AR platforms, we have recently seen a surge of marketed 'tactical shotguns' with a host of rail features, which allows customizing the shotgun to a users' preference- be it via mounting and attachment of flashlights, forearm enhancers, sling attachment points and various sights and scopes.
i have opted to attach the magazine tri-rail on my shotgun to allow me to customize my firearm according to my preference, especially to my orientation as a left-handed individual...for shotguns with 18 inches barrel length, location of the tri-rail along the magtube was a matter of personal preference. but since i had a combination of having a shorter barrel and magazine length (14 inches) as well as a shorter forearm length (i had the 6 1/2 mossberg shorter forearm), my real estate was somewhat limited to the 1 1/2 inches free space along my magazine tube between my forearm and my magazine attachment lug-just where my heatshield flange attachment is also located...Hence my initial preference for the said tri-rail was the original Laserlyte tri-rail from USA, since it was a perfect choice for it offered versatility in mounting various devices, it takes up very little space and it is a drop-in part and no gunsmithing is needed, as it was compatible also with heatshields
i have initially bought an NC Star Tri-Rail- (thank you for this sir Optics of PPF Forums) a China made copy of magazine installed tri-rails for shotguns in the market...all in all a still very good product...if not for an additional requirement i needed in purchasing and installing the said accessory-It has to be installed together with my heatshield..under no circumstance will i remove my heatshield just to have the tri-rail fit. Thru no fault of the seller for he has forwarned me of its incompatibility with the heatshield flange, i still went ahead with the purchase only to find out first hand that I cannot fit it without extensive modifications- something i am not equipped nor skilled to undertake...i was resigned to have it done by a gunsmith in the unforeseeable future, when i also had my other accessories that i was still waiting for delivery..
But lady fortune was maybe a little kind for just last weekend i saw a laserlyte tri-rail offered by sir spartan300 ..I debated to wether i should purchase it or not, for if it didnt fit again and proved to be incompatible, ill be having two tri-rails in my inventory and none still on my shotgun! But i gambled and researched...and took the plunge of purchasing it today...
(thank you sir spartan300 of PPF forums! thank you for the discount!) Further research on the laserlyte tri rail proved that it was compatible to fit with mossberg heatshields, and that it involved a technique in securing the heatshield flanges (since its under tension) beforehand on the flanges of the tri-rail itself...or you will end up hours upon hours trying to resecure the heatshield flanges on the trirail...most of my research involved just describing it by other forumers from various shotgun forums, i want to help others also in this predicament, im taking this a step further and provide pictures for better understanding...
NC Star Tri-rail and Laserlyte Tri-rail: note finish, Laserlyte is much smoother and has tougher anodizing, also note the large area to clamp on the Laserlyte
first step-remove outer nut of heatshield flange
do not remove second nut- note that flange tension is still being held by the other nut
2nd step-secure Laserlyte tri-rail flange over the heatshield flange where there is no more nut- this is easy since the tension is still held by the other nut..note that i placed a small hex key to aid me further in securing the location
3rd step-while securing the other location hole, carefully remove the other nut until it is fully disengaged and the tension of the flange is now transferred to the tri-rail flange carefully remove the other nut and carefully align the holes in the nut as shown here
4th step-thread all holes with provided hardware nuts from the tri-rail, makes sure that it is securely threaded on the back, without threading too tightly and clamping too much laso on th magazine tube, since this would prevent easy disassembly
finished, with flashlight installed on the rail
Build Update:
You may have noticed that i have reinstalled my regular stock: after much consideration, i have come to the conclusion that the a pistol grip set-up is just not for me...i am more fluid in movement, more in control using a regular stock as opposed to the pistol gripped one, largely due to my left hand orientation...i am not saying it is the correct one and should only be the preferred or 'right' set up-though regular stocks and its variants are correct and perfect for me..after all, one of the objectives i had for this build is to make an economical and adequate self-defense tool that fits me adequately...
plus another big reason...one word...Magpul...
ps i missed this site! barely recognized it becoz of the 'new look' and may take for awhile for me before i get used to it..
Nicely done havoc.
Pistol gripped stocks have their uses, but I much prefer a traditional stock for most of my shooting...
Pistol gripped stocks have their uses, but I much prefer a traditional stock for most of my shooting...
havoc21
.410
Old Mossy, LES, and Aksavanaman: thank you for your kind words... coming from you guys, its a very big compliment, and i appreciate it very much..
loving the tri-rail! i like how the flashlight hugs the barrel now, so low profile! unlike my set up before where the flashlight was placed at the foreend...this is definitely an improvement...
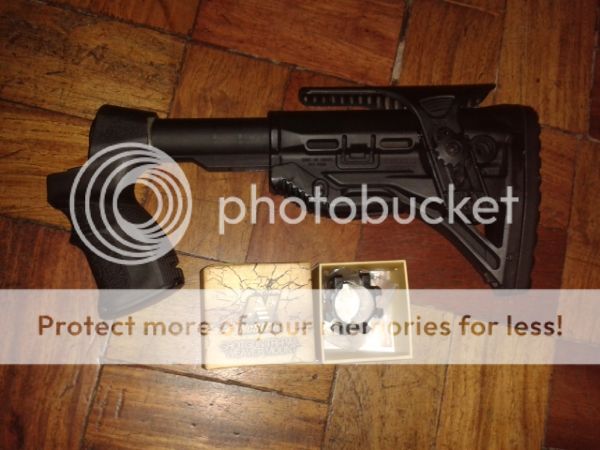
the standard stock has always been my preference...just couldnt pass up on a good deal on the Fab Defense pistol gripped AR style stock...but just the same, i have experienced using it first hand and can definitely say emphatically that it is JUST NOT FOR ME....
there are other local shotgunners here that love the pistol grip set-up, so im just waiting for the right person here to hit me an offer and they can take it off my hands...
Although a feature i like about the fab defense stock is the adjustable cheekpiece since its just right for my raised sights (well, at least my raised rear sight-my raised front sight is still on order, hehehehe)
but the Magpul SGA Stock-man that is personally for me, an evolution of the standard stock! i want it very much! adjustable cheekpiece! adjustable LOP! great ergonomics! overall awesome product!!!!
Please take my money, i want one Please!!!!
coming from you guys, its a very big compliment, and i appreciate it very much..loving the tri-rail! i like how the flashlight hugs the barrel now, so low profile! unlike my set up before where the flashlight was placed at the foreend...this is definitely an improvement...
the standard stock has always been my preference...just couldnt pass up on a good deal on the Fab Defense pistol gripped AR style stock...but just the same, i have experienced using it first hand and can definitely say emphatically that it is JUST NOT FOR ME....
there are other local shotgunners here that love the pistol grip set-up, so im just waiting for the right person here to hit me an offer and they can take it off my hands...
Although a feature i like about the fab defense stock is the adjustable cheekpiece since its just right for my raised sights (well, at least my raised rear sight-my raised front sight is still on order, hehehehe)
but the Magpul SGA Stock-man that is personally for me, an evolution of the standard stock! i want it very much! adjustable cheekpiece! adjustable LOP! great ergonomics! overall awesome product!!!!
Please take my money, i want one Please!!!!
JoeRotella
.270 WIN
Very Nice job - you can see that a ton of work went into it!
S
s6275
Guest
Wow. Amazing work.
havoc21
.410
John A: thank you sir...i want to tell you a little secret...most of my inspiration for my present shotgun set-up, i got it here from this very site...
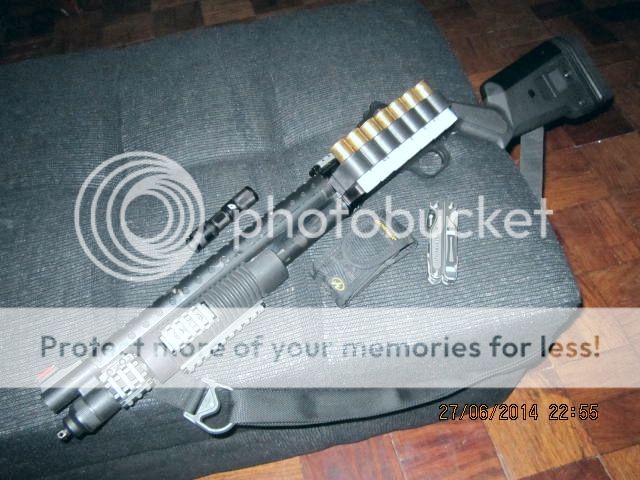
still considering what you said..and thinking of other ways, aside from the bandolier you suggested, on how to carry more ammo ON the shotgun itself (aside from 5 in the mag, 1 in the chamber and 7 on the shotshell holder )...should i think of or research and found an alternative way, im gonna share it here and hope to ask what you guys think of it also...
S6275: thank you sir.. thats what i like best on the mossberg shotgun....it is such an amazing shotgun platfrom to begin with, even on bead sight plain barrel no frills stock configuration...i just got a little creative especially on the DIYs (oppressive gun laws and FA ownership in our country-even a simple trip to the gunsmith means you have to secure a Permit to Transport first or you might end up in jail if caught without one, hence if you can do it yourself, so much better) and i wanted my shotgun to have its own personality reflecting my indentity-tactical/practical, short & sweet, no nonsense Pinoy Boomstick....
still considering what you said..and thinking of other ways, aside from the bandolier you suggested, on how to carry more ammo ON the shotgun itself (aside from 5 in the mag, 1 in the chamber and 7 on the shotshell holder
)...should i think of or research and found an alternative way, im gonna share it here and hope to ask what you guys think of it also...S6275: thank you sir..
thats what i like best on the mossberg shotgun....it is such an amazing shotgun platfrom to begin with, even on bead sight plain barrel no frills stock configuration...i just got a little creative especially on the DIYs (oppressive gun laws and FA ownership in our country-even a simple trip to the gunsmith means you have to secure a Permit to Transport first or you might end up in jail if caught without one, hence if you can do it yourself, so much better) and i wanted my shotgun to have its own personality reflecting my indentity-tactical/practical, short & sweet, no nonsense Pinoy Boomstick....havoc21
.410
Havoc!! You've created a Monster!! WoW, what a build!!
hi sir Scott
well i do hope not-created a monster i mean... thank you sir again for your appreciation...
, as there are no shotguns and related accessories in our corner grocery store, i have to be a little creative here... Seriously, since this is just basically about creating/customizing your favorite firearm platform (for me the shotgun
), personally handpicking the parts and accessories, doin it yourself, haggling for prices, trying out new or different things, and trying out the mods you've done to know wether if it works for you or not-all to suit your personal preferences-something that an average joe like me can do-thus i am sure you can do it also....but one thing is for certain...this is really one helluva fun build...
i encourage you Scott to do your dream build of your favorite firearm...hope to see that build in one of the threads here soon...and pls dont forget to post pictures!!!
Last edited:
havoc21
.410

After four looooonnnnnnggggg months of waiting, i finally have my Magpul SGA Stock for mossberg 500/590...
couldnt wait till sunday (which my importer told me get the stock from him) so i got this yesterday thru my importer...due to my long wait, my importer was gracious enough to give me a discount....
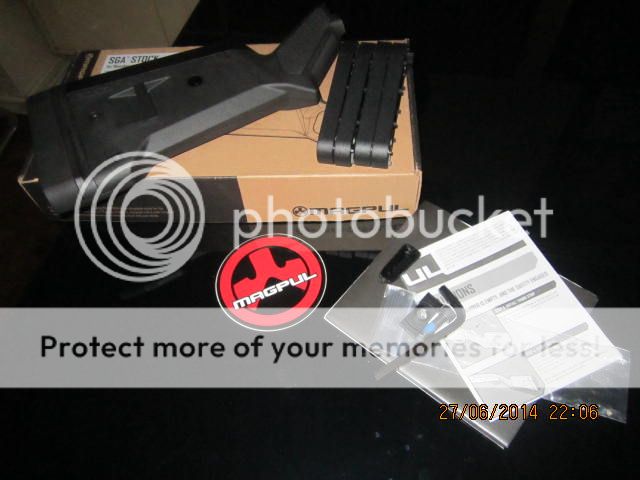
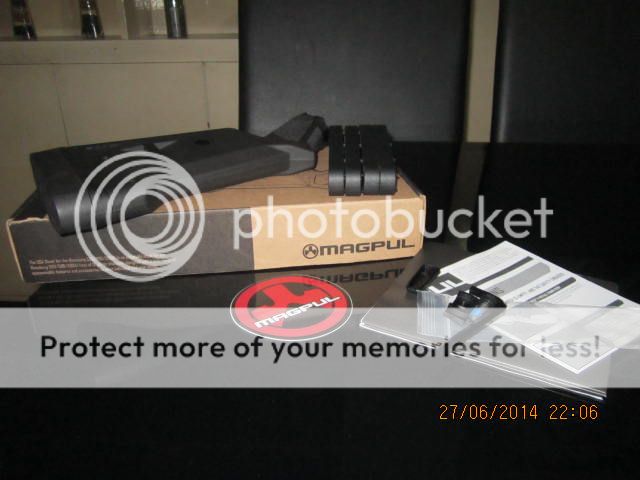
upon opening the package, it has printed instructions, 2013 catalogue, 4 LOP adjustment plastic spacers, 1 sga stock, 1 screw, 1 hex key, and magpul sticker...
interesting to note is the presence of blue locktite with the provided sga stock screw, and also provided hex key....
i just used one lop spacer...the length was just right...here is a picture comparing its length to my standard stock that i have cut down to size to fit me..

Thoughts on the Magpul SGA stock for mossberg:
Pros-
1. build quality is superb...made of heavy duty polymer...doesnt feel cheap..
2. Magpul was thoughful enough to provide another screw for the stock as well as a hex key to go with it..also the screw had locktite on in already...
3. Installation was easy enough and straightforward..
3. The buttpad that Magpul provided and came with the stock was soft on the shoulders but just firm enough also...a far cry from the stock hard rubber buttpad provided on standard mossberg stocks..
4. Ergonomics improved...its like getting both the best advantages of a pistol grip AR style stock and a standard stock, and placement of the safety hasnt been compromised.
5. LOP spacers make your sga stock fit you better...
6. Though to others its an acquired taste (others think its ugly) i personally think the aesthetics of my shotgun greatly improved...it looks more bad ass in my opinion :twisted:
Cons-
1. The price...especially the landed cost here in our country

2. For the price you paid, Magpul should have provided its other add ons, such as the quick release attachments, cheek riser kits, and paraclip/sling attachment....instead, if you want any of these, (as in my case, since i have an LPA sight, i need a lo or medium cheek riser attachment on my sga stock) you have to pay for each item seperately...shame on you Magpul...
Congrats!
Sucks they don't include the mentioned accessories, but it does look great...
Sucks they don't include the mentioned accessories, but it does look great...
havoc21
.410
Congrats!
Sucks they don't include the mentioned accessories, but it does look great...
LES: thanks! i paid three times the amount with what you would normally pay there...
but i guess you get what you pay for....my gripe is the small things should have been included by magpul...and not buy it seperately...but other than that, its what i always wanted and i am quite happy with how my shotgun turned out...