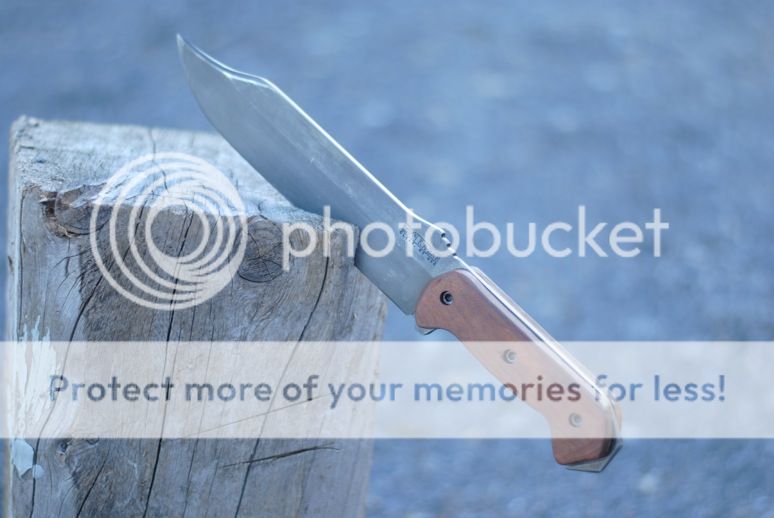
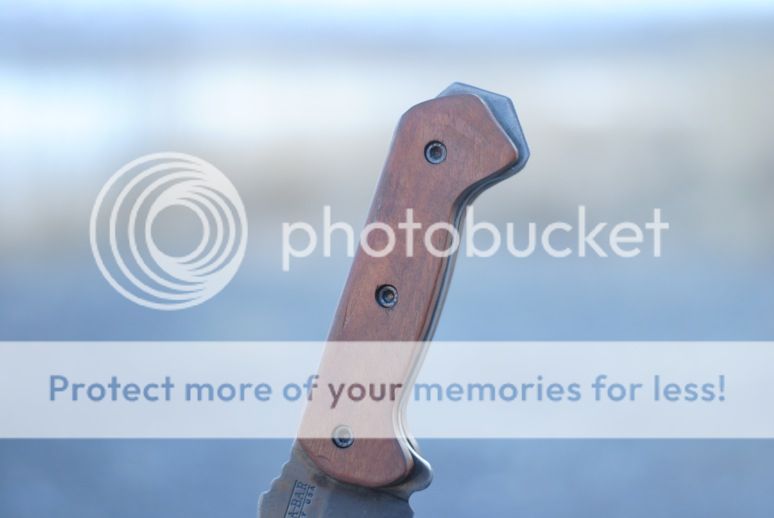
• Mossberg Owners is in the process of upgrading the software. Please bear with us while we transition to the new look and new upgraded software.

KaBar / Becker

aksavanaman said:
Ok, finally some a progress update with some pics... from here it's just sanding, shaping, and more sanding :D

DSC_0277_zps36997d01.jpg

^^^hindsight 20/20..next time you cut a pattern, cut about an 1/8" away from the line and sand/file up to it. That way, if you do happen to "not follow" the line, you still have room to fix it....


DSC_0280_zpsdca169ec.jpg


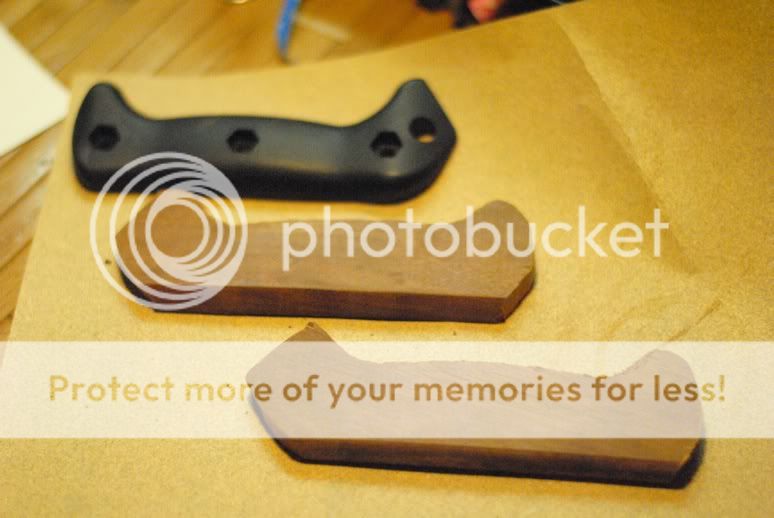
^^before you sand them, I suggest attaching double stick tape to the backside of one, and stick the other to it. Set it on the table/bench when you line up the other to it. Then use a file to get them to size. That way they both will be the same. Make sure though, when it's in the vice you are parallel with them both....
 
Phew... this is a slow project... to much crap to do... Got the wood pieces shaped and sanded pretty much to where I want them. Now it's time to think about drilling the holes for the mounting bolts. Any other suggestions OTHER than using a drill press? My first one with be slightly larger than the bolt going through, and then I'll dirll a second just large enough to counter sink the bolt heads. If you guys have any other suggestions I'm all ears :)
 
Are they sanded to size or shaped?

This a backwards way of doing it...

Take one side and mate it to the plastic one. And use a center punch. Then do the same with the other half, If you don't have a center punch, use a drill bit that fits the hole. Do it by hand. Twist the bit backwards to make a center mark on it. When you are going to drill the hole, the face of the handle hole side needs to be supported. Say block of pine. That way there will be less of a chance to have chip out.

Wait...Gunny is a woodworker....Let me introduce him to you here. Maybe he has a better solution.
Hold the fort bro...
 
GunnyGene said:
Ripjack, I got your PM about this. Not sure if I can offer much. One thing I would suggest is also drilling a very shallow countersink on the backside of each scale rivet hole, in addition to the one for the rivet heads. This will prevent any chance of the wood not seating well against the tang, which would cause a small gap between the tang and the scale. Also, I'd use a thin coat of epoxy in addition to the rivets to secure the scales and prevent any moisture intrusion (and resulting rust) between the tang and the scales.
 
Marc, Gunny... thanks for all the info and I'll definitely take all your advice to heart. I'll need to find a buddy with drill press since I don't have one of my own, until then... I'll finish up fully shaping the scales. Would silicone adhesive work as an epoxy as well ?
 
ripjack13 said:
No...not even close.

I'll second ripjack on the silly cone. :D Get one of those syringe types epoxy - like this Devcon http://www.lowes.com/pd_74809-34278-208 ... facetInfo= , or other similar brand. You don't need much, but work fast. Spread it moderately thin and clamp it up fairly snug, but don't over do it. Make sure all your holes line up, cause once it sets that's where it's gonna stay! You should get some squeeze out that you can sand off later. Leave it sit in the clamps several hours.
 
Only 5 months in the making guys.... sorry for those who have been waiting patiently, but I finally got these grips on and finished. Only used a couple of coats of linseed oil, beautiful wood! Thanks you Marc for supplying the pieces! I might go back and re-shape the scales just a bit, but for now I'm happy with the results. I'm terrible with woodwork so forgive the imperfections :D

DSC_0315.jpg
[/URL]
DSC_0314.jpg
[/URL]
 
Oh man dude!!!! That looks great!!! Great job!!
 
From what I remember its Ipe I believe, really hard (I don't know much about wood, it just took a lot to sand) and I love the color!
 
Ipe is correct....It's a great hard dense wood....

"Also called Brazilian walnut, ipe (pronounced ee-pay) wood is typically found in South America and some parts of Central America. It is one of the densest hardwoods available, three times harder than cedar. Ipe has the same fire rating as concrete and steel, meaning it resists flames much longer than softer woods, and is so dense that it doesn't float in water."

"Like redwood, it has a natural oil that keeps bugs out; it's resistant to mildew and decay, making it ideal for coastal construction. Ipe wood lasts a minimum of 25 years, although many architects say it can last up to half a century if maintained properly. In addition to its strength, it has a beautiful dark color and a tight grain that gives it a very consistent coloring."
 
lol, as goes with everything in my garage...somehow it get's attracted to corners. I'm not really sure, they'll probably end up in my used parts bin :D my buddy just started "forging" knives in his backyard out of scavenged spring steel... maybe they'll find life again!
 
The Mossberg 500 of the knife world.

For me it would have to be the Ka-bar Becker BK9.
It's big, it's black, and it's bad... just like the 500.
It's a no frills work horse that is quality made.

So if you had to pick the Mossberg 500 of the knife world, what would it be and why?


And here's my 500:


Here's a few pics of my stripped BK16. It has cocobolo scales and Ethan Becker engraved his signature at a little get together up here in the PNW. He's a cool dude and I'm glad to give him my business.
So much so, that I also own a BK5, 9, 10LE, 11, 13, and 14. :D


Back
Top